
Markup edits with GPT Image 2.6
Instead of describing where a change goes, you draw it. GPT Image 2.6 takes a second, transparent PNG
with only your marks on it, and the prompt says what each mark means. OpenAI: "You can now send a
marked-up image to the API to show exactly where you want an edit"
(@OpenAIDevs). OpenAI's guide: keep the original
as the first input, put the annotations on "a separate transparent PNG", send it as the markup, and
describe the changes in the prompt; "Markup applies to the first input image. Additional images serve
as references" (OpenAI image guide).
On varg the field is provider_options.fal.markup_image_url; fal: "Transparent PNG containing only
annotations (circles, arrows, notes) that guide the edit of the first image", and it "must match input
image dimensions".
The measured example (2026-11-05 on varg)
Idea by @IHayato, who drew a red and a blue circle on an illustration and asked 「赤丸にサンタ帽、青丸の本はプレゼントに」 ("a Santa hat in the red circle; the book in the blue circle becomes a present"): "face, hair ornament and clothes stayed the same, only the inside of the circles was redrawn, in a little over 20 seconds" (translated from the post).
Ours, with gpt_image_2_6:
| Source (1024×768) | Markup layer | After |
|---|---|---|
| cosy reading nook | two ellipses, red and blue, 10 px | Santa hat on the cat, the book is a wrapped present |
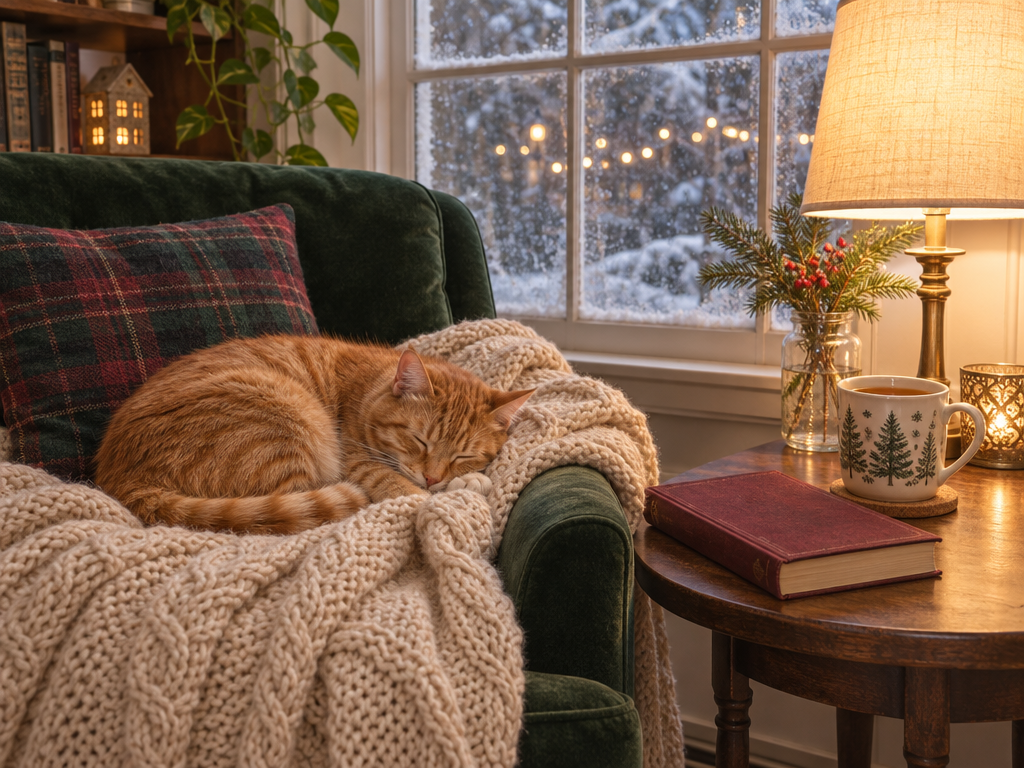
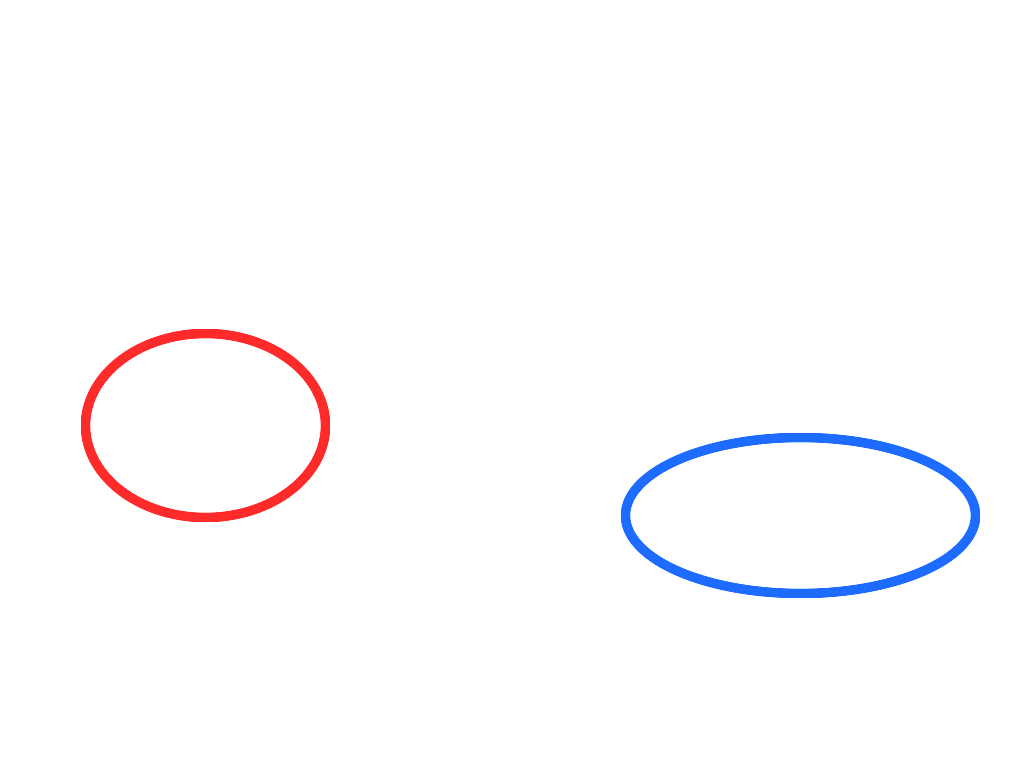
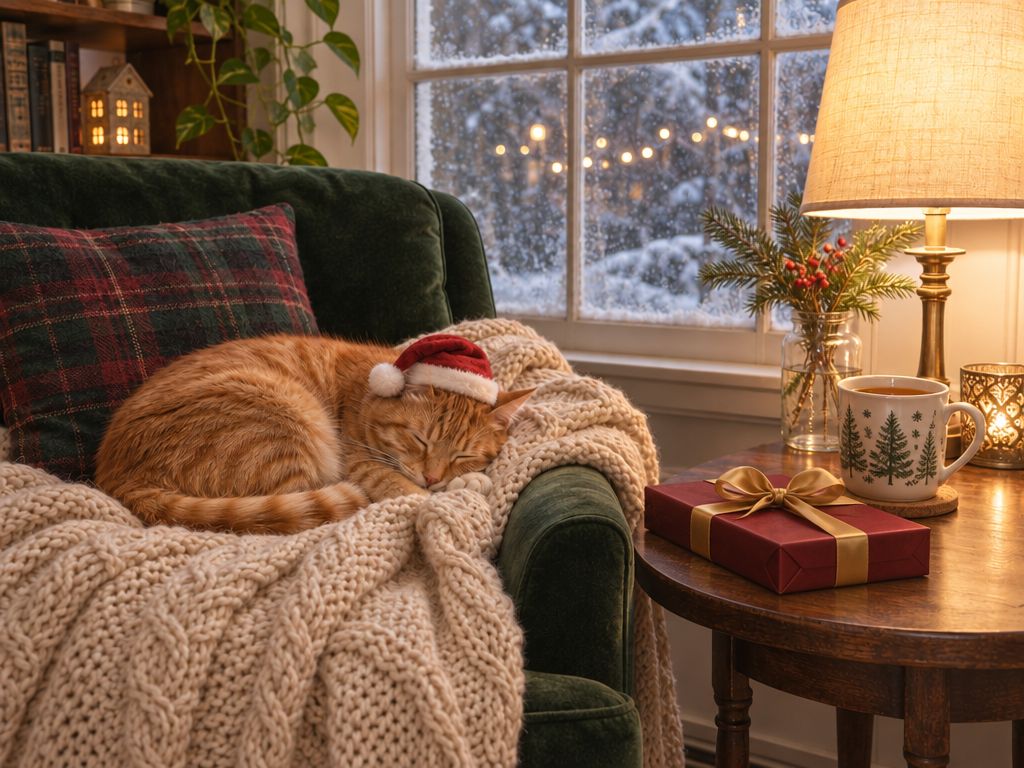
Prompt: Red circle: Santa hat on the cat. Blue circle: book → wrapped present. Change nothing outside the circles.
7 credits. Outside the circles, 2.4% of pixels changed by more than 10% (mean change 6 of 255); inside
the circles 14.1% did (measured with the mask from markup.py --mask, grown by 20 px). The full-frame
diff (magick compare, 10% fuzz) flags 3.6% of pixels: the hat, the present, and light speckle on the
pillow, the plant and the mug.
1. Draw the markup: scripts/markup.py
Write the marks as JSON. Pixel coordinates of the source, or fractions (0-1) of its width and height:
{
  "units": "px",
  "width": 10,
  "shapes": [
    {"type": "ellipse", "box": [81, 329, 329, 521], "color": "red",  "label": "Santa hat on the cat"},
    {"type": "ellipse", "box": [621, 433, 979, 597], "color": "blue", "label": "book → wrapped present"}
  ]
}
python3 scripts/markup.py nook.png examples/nook.json -o nook_markup.png --preview nook_preview.png
markup   nook_markup.png (1024x768, RGBA, transparent outside the marks)
preview  nook_preview.png
prompt:
  Red circle: Santa hat on the cat.
  Blue circle: book → wrapped present.
  Change nothing outside the marks.
- Shapes:
ellipseandrect(box: [x0, y0, x1, y1]),arrow(from,to),text(at,text). labelgoes into the printed prompt only.note(1-3 words) is also drawn on the markup next to the shape, in the shape's colour with a white outline.examples/notes.jsonshows a box with a note and an arrow.- Colours: red, blue, green, yellow, magenta, orange, cyan, white, black or
#RRGGBB. Use one colour per change and colours that stand out from the image. - Stroke width defaults to 1.3% of the short side (10 px at 768), the width of the measured example.
- The markup is always the source's exact size and fully transparent outside the marks. Open the preview before you upload: a circle that misses the object misleads the edit.
Tested 2026-11-05: examples/nook.json on the source above reproduces the example markup (same bounding
box, 91% of its marked pixels overlap; the difference is in the stroke edges); examples/notes.json draws a
box, an arrow and two notes.
2. Upload both and edit
Upload the source and the markup (create_upload on the MCP, or POST /v2/files; see
gpt-image-2-6 section 6), then:
call_tool({
  "tool": "image",
  "input": {
    "model": "gpt_image_2_6",
    "prompt": "Red circle: Santa hat on the cat. Blue circle: book → wrapped present. Change nothing outside the circles.",
    "files": [{"url": "https://s3.varg.ai/files/194b94d0-58ff-4e8b-91de-4f1959d04013/file_736079abc4e4.png"}],
    "provider_options": {"fal": {
      "markup_image_url": "https://s3.varg.ai/files/194b94d0-58ff-4e8b-91de-4f1959d04013/file_af0957634427.png",
      "quality": "high",
      "reasoning_effort": "low"
    }}
  },
  "wait": true
})
- The source must be the first file; more files are references (e.g. a photo of the exact hat).
reasoning_effort: OpenAI: "For most edits, start with low complexity. If a scene has several elements or constraints to juggle, try medium or high" (@OpenAIDevs).qualityis separate: keephighfor the final.- With
filesthe call goes to the edit route by itself. For a chain of edits on one image, pinfal:openai/gpt-image-2.6/sunburst/edit(OpenAI says Sunburst keeps details more consistent across edits).
3. Write the prompt per colour
- One line per mark:
<Colour> <shape>: <what it becomes>.Name the colour and the shape exactly as drawn. - Say what the thing becomes, not how to draw it: "book → wrapped present", "the word SALE → SOLD".
- End with the boundary:
Change nothing outside the circles.(the line in the measured example). - Do all changes in one pass. Each extra edit round costs detail: faces changed from the second edit on (@k_matsumaru), wear showed from about the third (@NeneneAI). Go back to the original rather than editing an edit.
4. Check what changed
magick compare -fuzz 10% -metric AE before.png after.png diff.png # prints changed pixels; red in diff.png
Red outside your marks means the model touched more than you asked. A few percent of speckle is normal (3.6% in our example, mostly texture); a moved face or a changed sign is not. Rerun with a tighter mark, or with a mask (section 5).
5. Markup or mask?
markup_image_url |
mask_url |
|
|---|---|---|
| What you send | Transparent PNG with circles, arrows, notes | Black-and-white PNG, same size: "White marks regions to edit and black marks regions to keep" (fal) |
| Best for | Several separate changes in one pass; "this thing → that thing"; rough areas | One exact region with hard edges: replace a background, a sky, a label area, the inside of a frame |
| The prompt says | What each colour means | What fills the white area |
| Precision | Guidance | Also guidance: "Masking with GPT Image is entirely prompt-based. The model uses the mask as guidance, but may not follow its exact shape with complete precision" (OpenAI guide) |
You cannot send both in one call (fal). markup.py --mask mask.png writes the filled shapes as white
on black from the same JSON, so you can try both from one drawing. We measured the markup route; we did
not run a mask_url edit for this skill.
6. Failure → fix
| What you see | Fix |
|---|---|
| The marks themselves are drawn into the result | Send the marks only as markup_image_url, never painted onto the source |
markup_image_url rejected |
The markup is not the source's exact size, not a PNG with transparency, or the call also has mask_url |
| The edit lands next to the mark | Tighter shape around the object; an arrow pointing at it; the object named in the line |
| Things outside the marks change | Change nothing outside the …; fewer marks per pass; the diff check; a mask for hard edges |
| A face changes after several rounds | Edit from the original; all changes in one pass; Sunburst for chains |
Related skills
gpt-image-2-6 (model guide, prices, recipes), gpt-image-gif and gpt-image-sticker-pack (fix a still before you animate it), gpt-image-sprite-sheet (circle one broken frame in a sheet).